Ohaus Navigator (NV), Navigator XL (NVL) and Navigator XT (NVT) scales – what’s the difference?
Physical dimensions
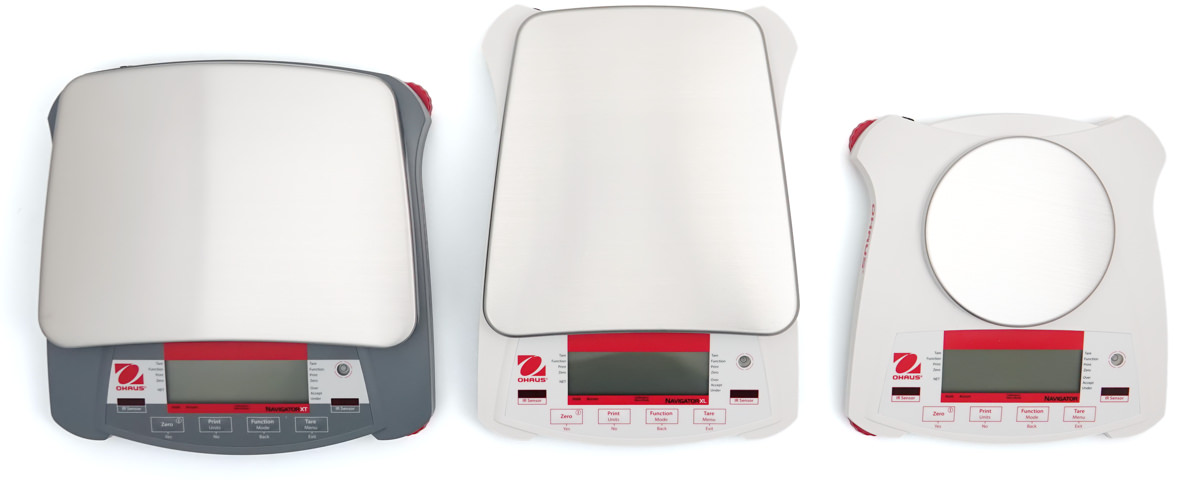
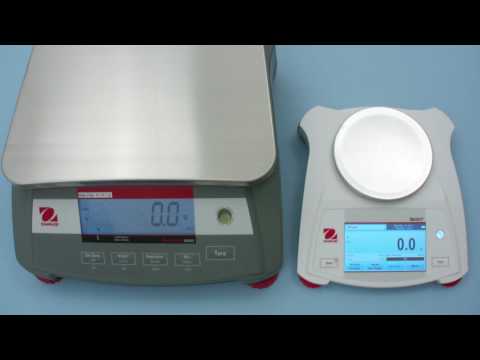
While all scales in the Ohaus Navigator product range are fairly compact, their dimensions vary according to the series to which they belong. In our photo, you’ll see the Navigator XT (NVT) on the left, the narrow and lengthy Navigator XL (NVL) in the middle and the smaller Navigator (NV) on the right:
The Navigator (NV) is the only one with different platform shapes within the series: The NV212 – the only scale with 0,01g readability in the entire range – has a round platform as shown in the picture while higher capacity scales have a platform which is similar to the other series.
Dimensions (width x length x height in mm)
Navigator XT (NVT): 240 x 249.5 x 69.8 Navigator XL (NVL): 204 x 282 x 74 Navigator (NV): 204 x 212 x 58
Options
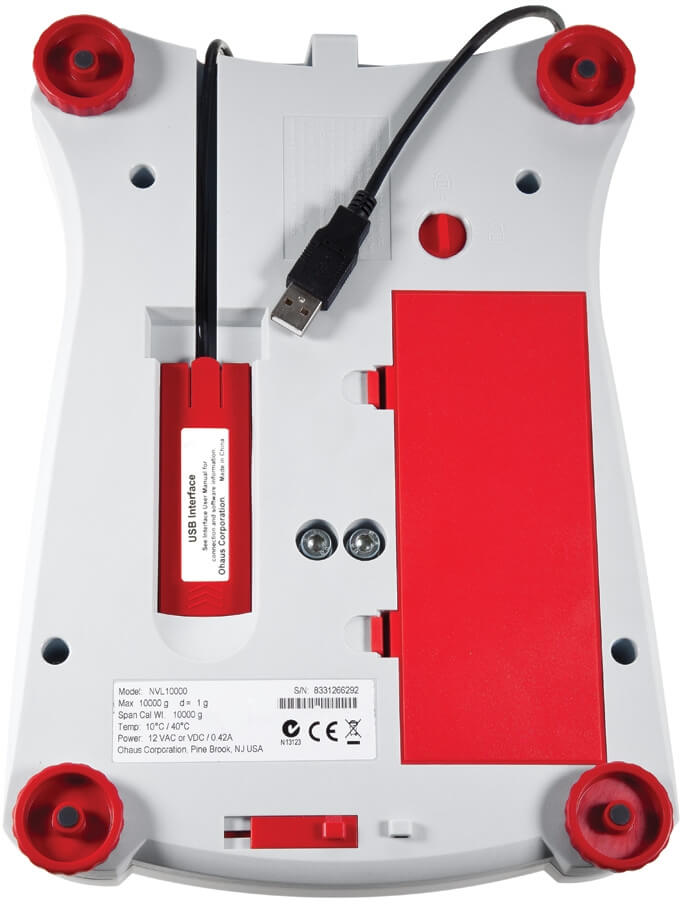
All scales can use the same interface options (RS-232, USB or Ethernet) as they have the same option slot on the bottom. The photo provided by Ohaus shows the Navigator XL (NVL) with installed USB interface:
However, only the Navigator XL (NVL) and XT (NVT) series have room for an optional rechargeable battery:
The scales can also be used with non-rechargeable batteries (4 size AA batteries for the NV and 4 sice C batteries for the NVL and NVT).
Performance
All scales stabilize quickly (within one second according to Ohaus) and perform similarly:
Model
Repeatability
Linearity
OCL
NV212
2 d
± 2 d
± 3 d
NV511
2 d
± 2 d
± 3 d
NV1101
2 d
± 2 d
± 3 d
NV2101
2 d
± 2 d
± 3 d
NV4101
2 d
± 2 d
± 3 d
NV5101
2 d
± 2 d
± 3 d
NVL511
2 d
± 2 d
± 3 d
NVL1101
2 d
± 2 d
± 3 d
NVL2101
2 d
± 2 d
± 3 d
NVL5101
2 d
± 2 d
± 3 d
NVL10000
2 d
± 2 d
± 3 d
NVL20000
2 d
± 2 d
± 3 d
NVT1601
2 d
± 2 d
± 3 d
NVT3201
2 d
± 2 d
± 3 d
NVT6401
2 d
± 2 d
± 3 d
NVT10001
2 d
± 2 d
± 3 d
NVT16000
2 d
± 2 d
± 3 d
The values are expressed in scale intervals (d, difference between two successive indications, often also referred to as “(display) division” or “readability”). OCL stands for off center load. To minimize the OCL error, place the weight in the center of the platform. Approved models are not included in the table as their availability varies by region.
Many scales and balances are equipped with an RS-232 interface. Moxa’s NPort series and similar serial device servers allow you to connect such scales to a network (Ethernet). In this article, I’ll show you how to connect a Moxa NPort 5110A to an Ohaus scale and how to configure and test it.
1. Physical connection
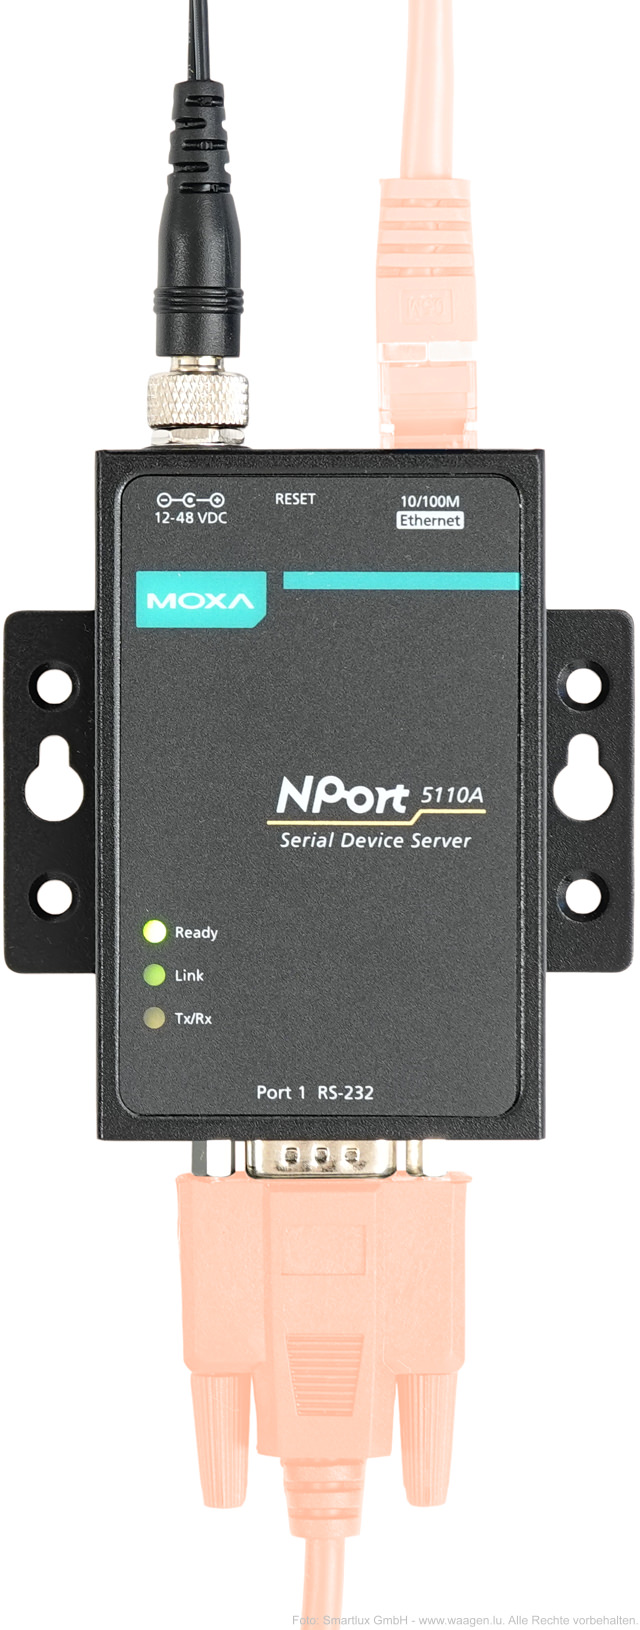
The Moxa Nport 5110A has an RS-232 port (DE9M) on one side and an Ethernet port on the other side:
Data cables (red) are not included.
To communicate with your scale, you’ll need a matching RS-232 cable. The Ohaus Defender 3000 scale used in this example requires a DE9M to DE9F straight (1:1) cable:
Once the physical connection to the scale has been established, the Moxa NPort has to be configured. There are several ways to do so. I prefer the following method:
Connect the NPort directly to a single computer (not a LAN) with an Ethernet cable.
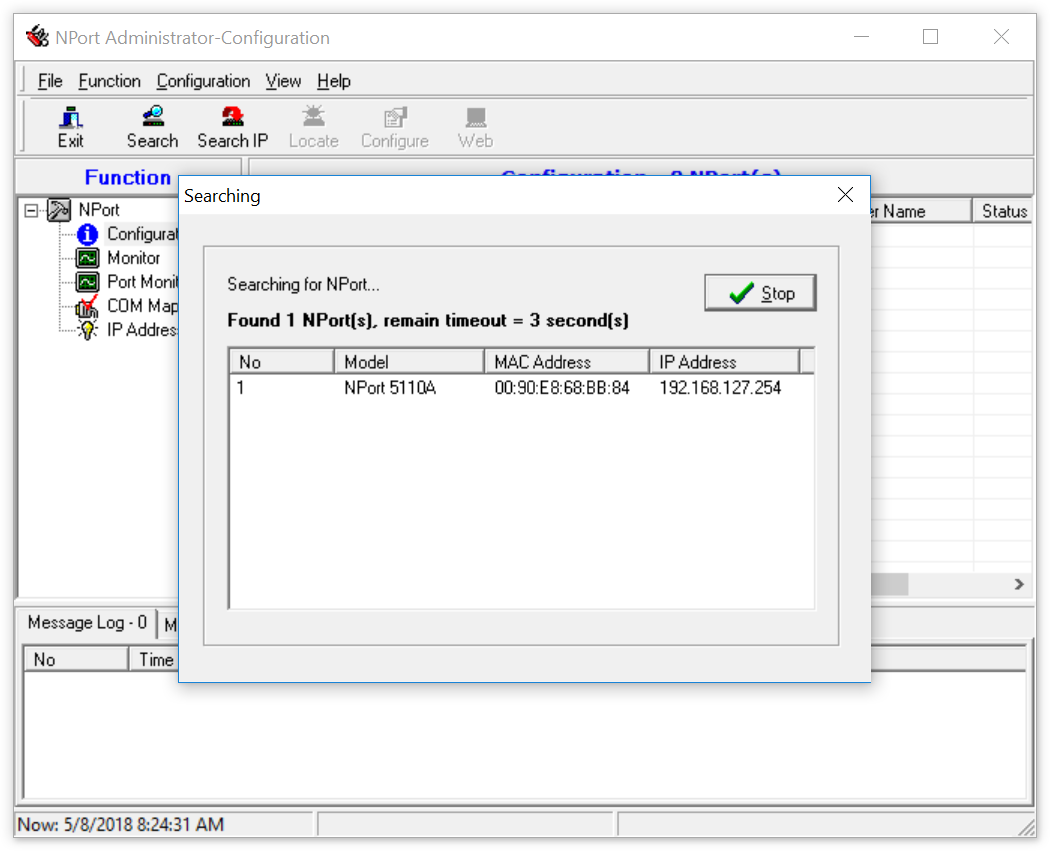
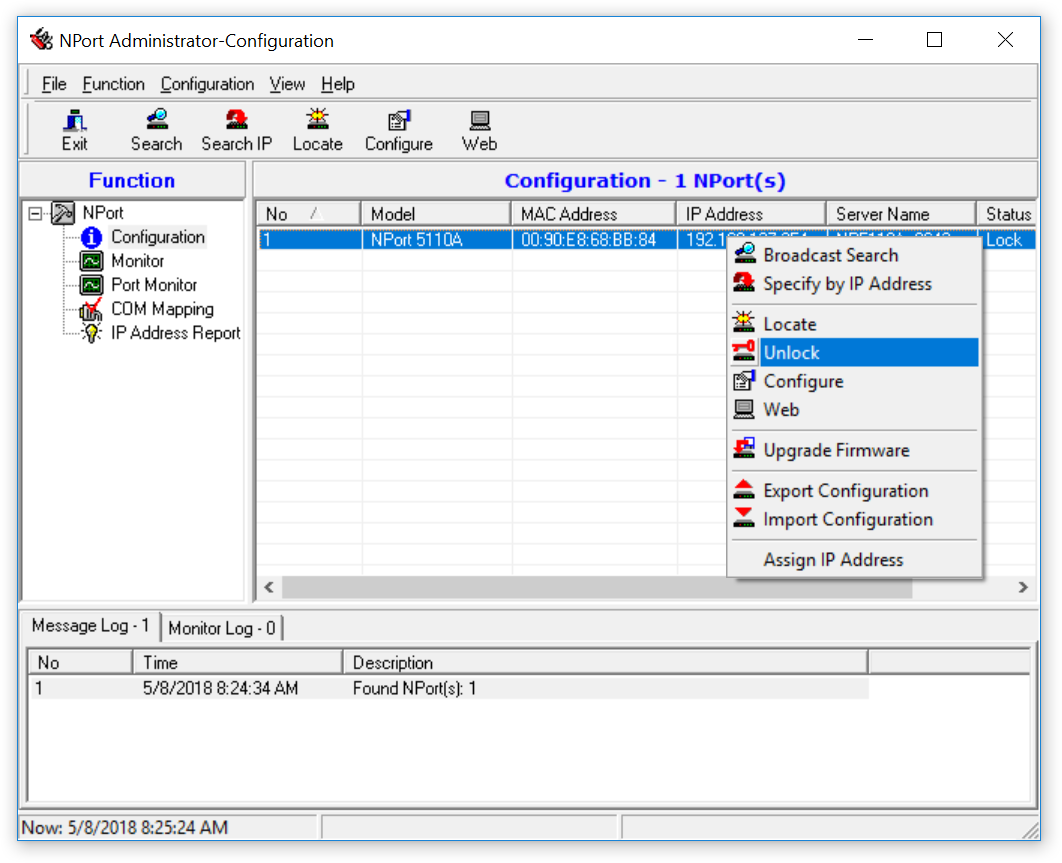
Start the NPort Administrator and locate your NPort by clicking on the Search button:
It should be found at the default IP address (192.168.127.254).
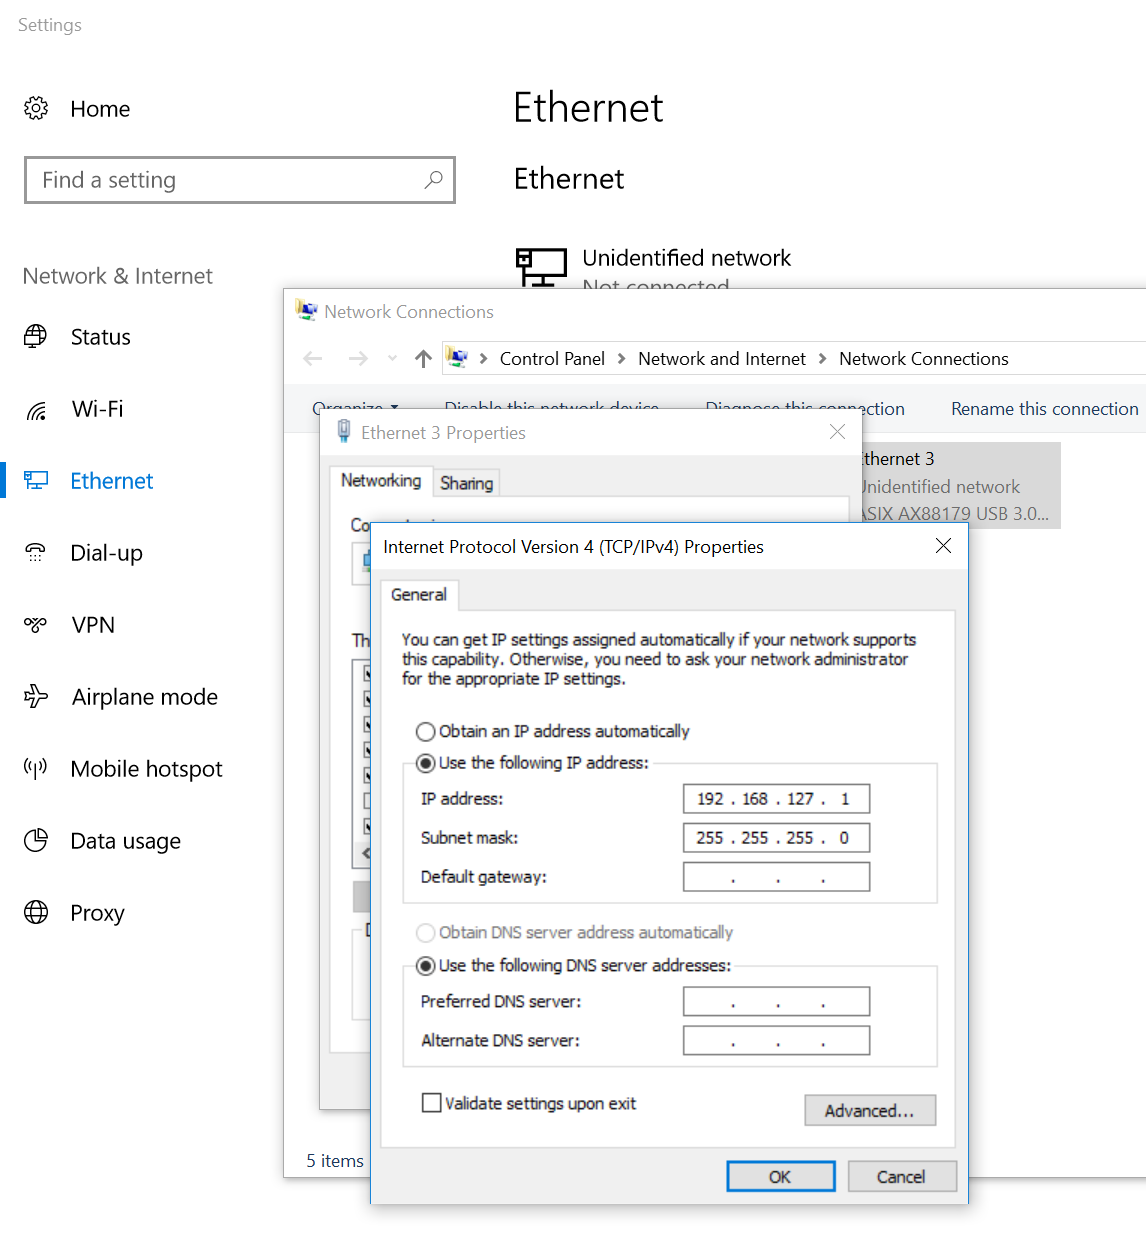
Note: It’s not always necessary to change your PC’s IP address if you’re running the NPort Administrator software. However, if you receive error messages during the following steps, try to temporarily set your computer’s IP address to an address on the same subnet (such as 192.168.127.1).
Select the Ethernet connection under Control Panel > Network and Internet > Network connections, right-click on it and choose Properties, then select Internet Protocol Version 4 (TCP/IPv4) and click on Properties. Make a note of your current settings so that you can restore them later, then enter the temporary IP address:
If the NPort is shown as locked, right-click on it and select Unlock: The default password is “moxa”.
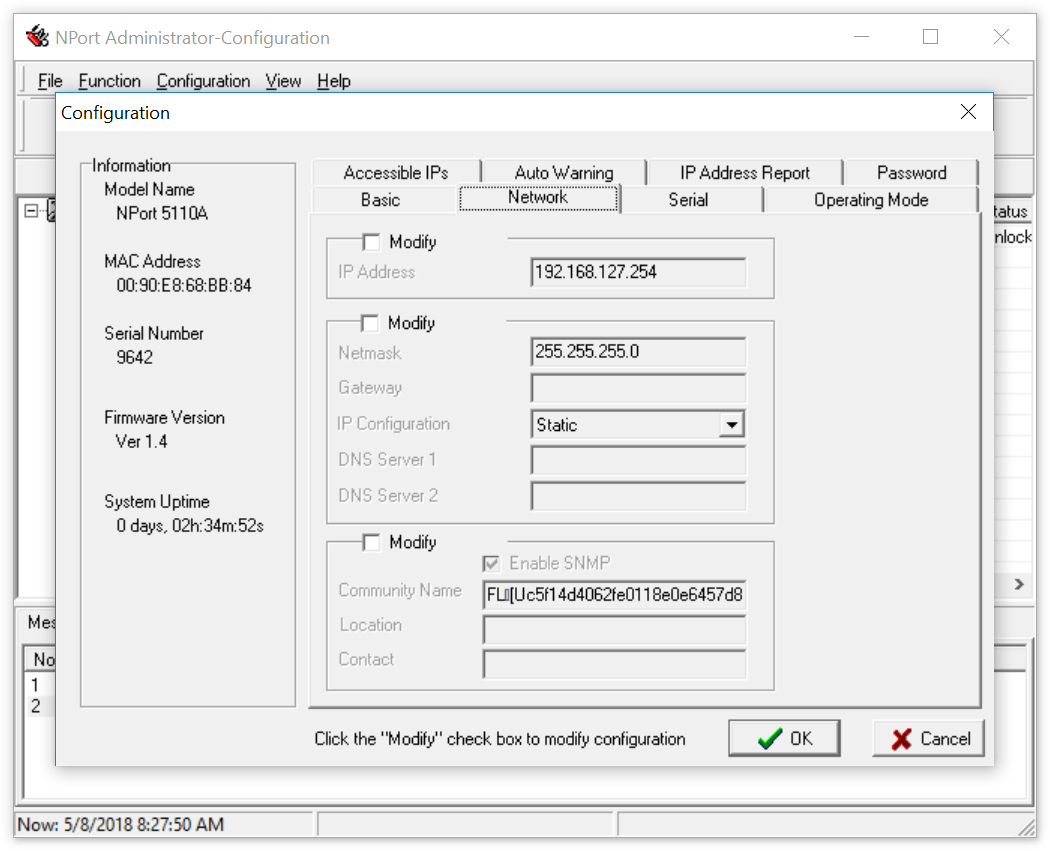
Right-click again and select Configure, then select the Network tab: Enter a static IP address, subnet mask and gateway that work on your network (or select DHCP or BOOTP for automatic address assignment, though this is not recommended for most operating modes).
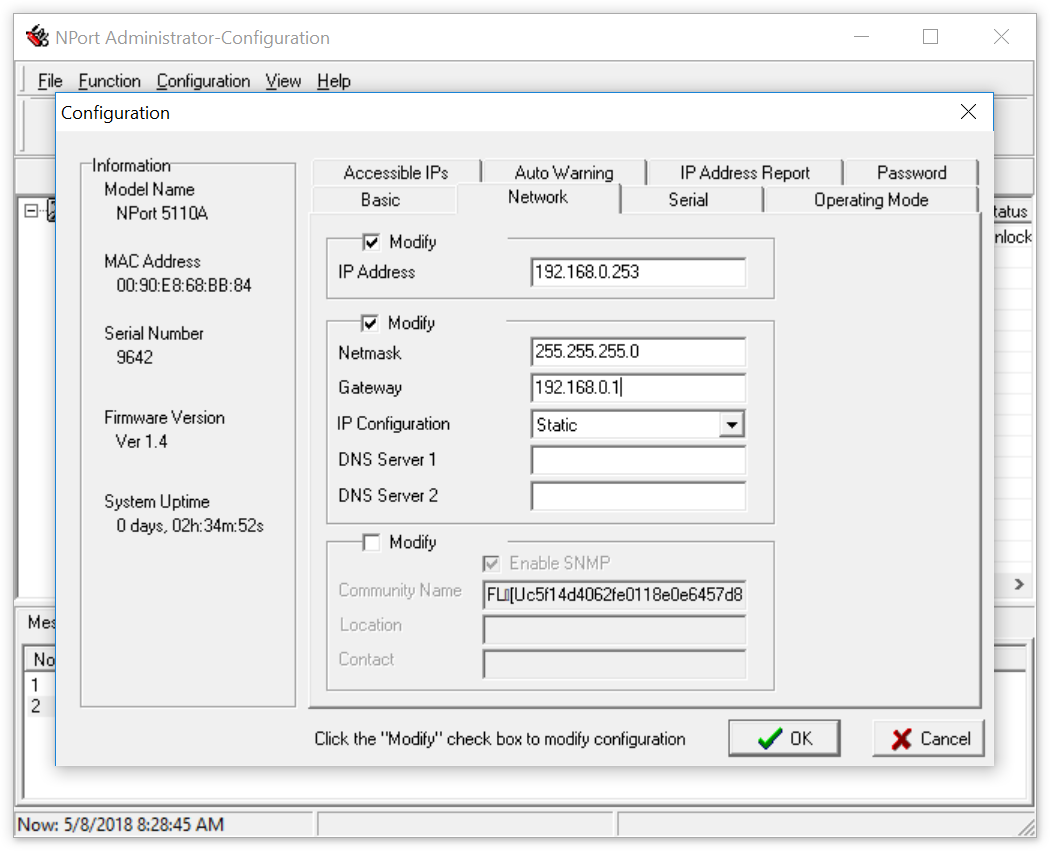
To make the NPort accessible on our network, I set its IP address to 192.168.0.253:
With the network configuration complete, you can disconnect the NPort 5110A from your computer and connect it to your network (LAN).
3. RS-232 configuration
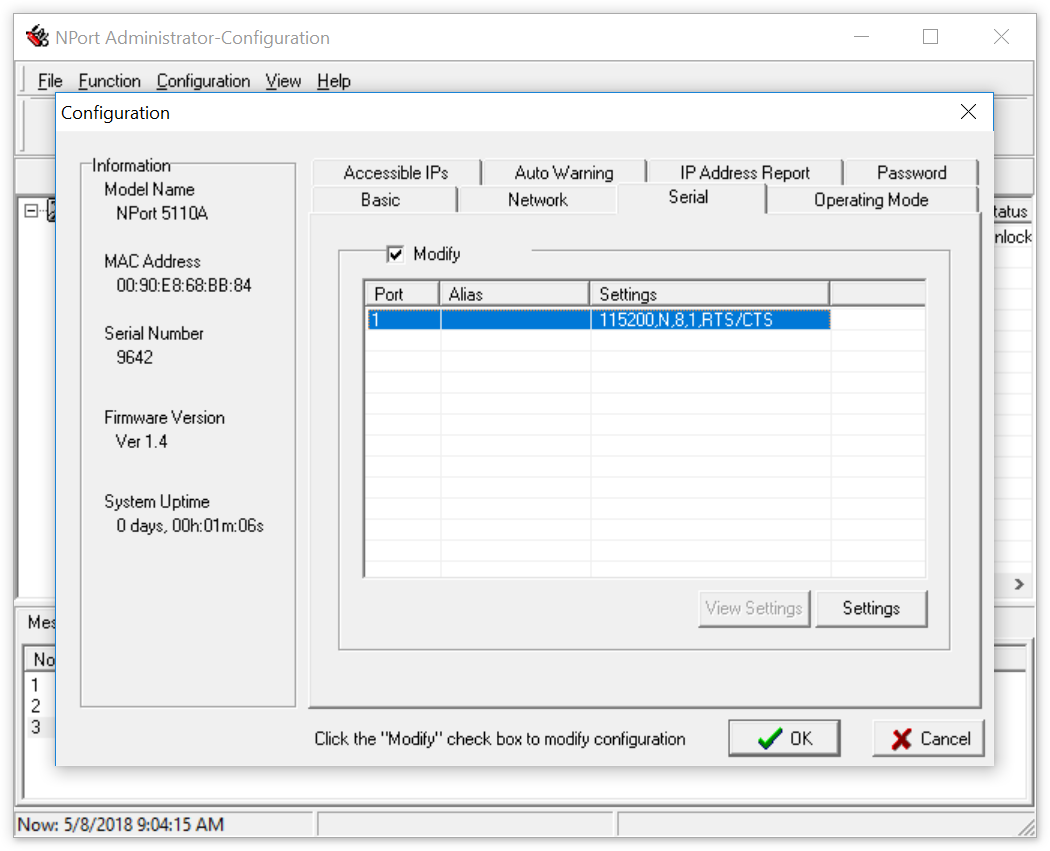
It is essential that both the NPort and the scale use the same settings for the serial port (RS-232). In the Serial tab, select the port (the NPort 5110A only has one, but you still have to select it), check Modify and click on Settings:
Enter the RS-232 settings found in your scale’s menu or user manual. The default settings of our Ohaus Defender 3000 scale are shown in the screenshot below:
Important: By default, the NPort is set to CTS/RTS flow control! You cannot change this setting when using the Setup Wizard through the web console. As mentioned before, I recommend using the NPort Administrator software instead.
4. Set an operating mode
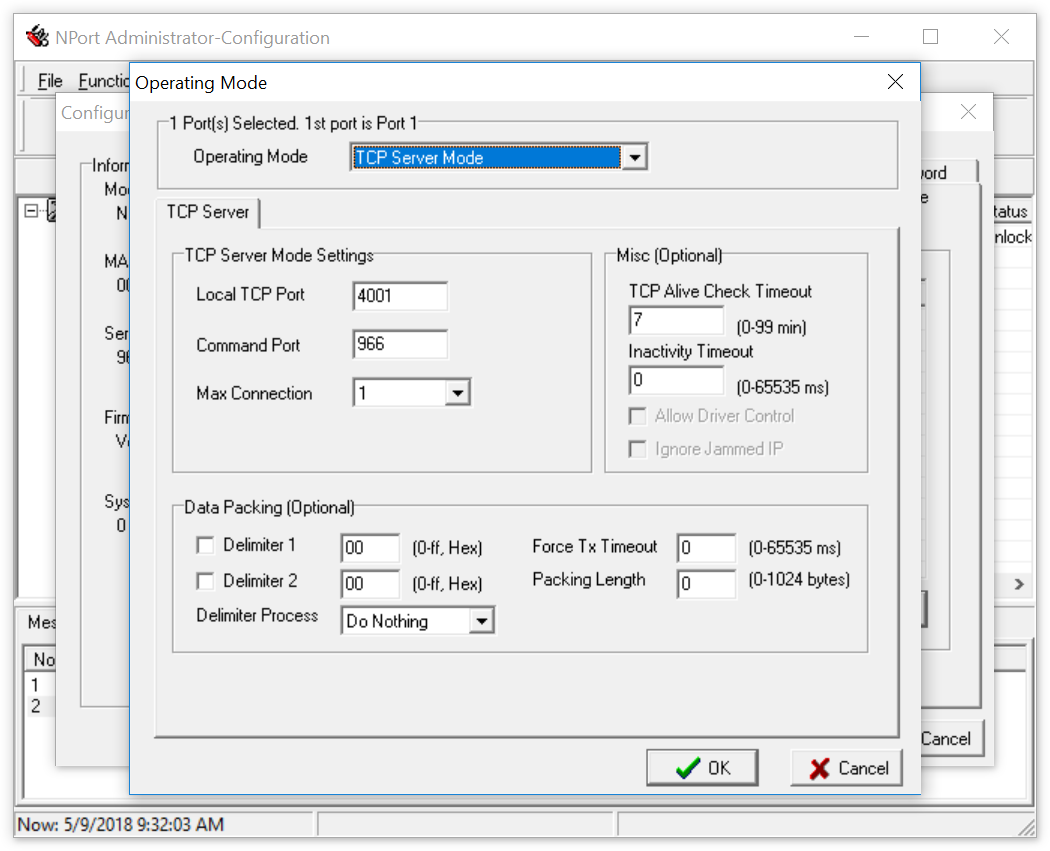
To change the mode, go to the Operating Mode tab, check Modify, select the port and click on Settings:
The NPort 5110A supports several operating modes, I will only discuss the following two here:
Real COM mode: This mode allows you to create a virtual COM port on a PC and use the scale as if it were connected directly to that PC. This is very useful when you’re using software which only supports connections to COM ports and cannot communicate over TCP/IP (such as our 232key virtual keyboard wedge software). Please note that you’ll have to install a virtual COM port driver on the PC that communicates with the scale. In my tests on Windows 10, setting up the COM port through NPort Administrator did not create a new virtual COM port on the system. However, using the NPort Windows Driver Manager worked.
TCP Server: The NPort acts as a server, waiting for incoming connections from TCP clients on port 4001 (or on another user-defined port). The maximum number of concurrent connections can be changed from 1 (default) to up to 8. This mode works with software like our Simple Data Logger and many others.
Note: It is not necessary to set the data packing options unless you want to optimize either for minimal latency or maximum throughput. By default, the device will try to find a reasonable compromise (this is likely achieved by observing the delay between the data received over RS-232 to determine when a “line” of data is complete).
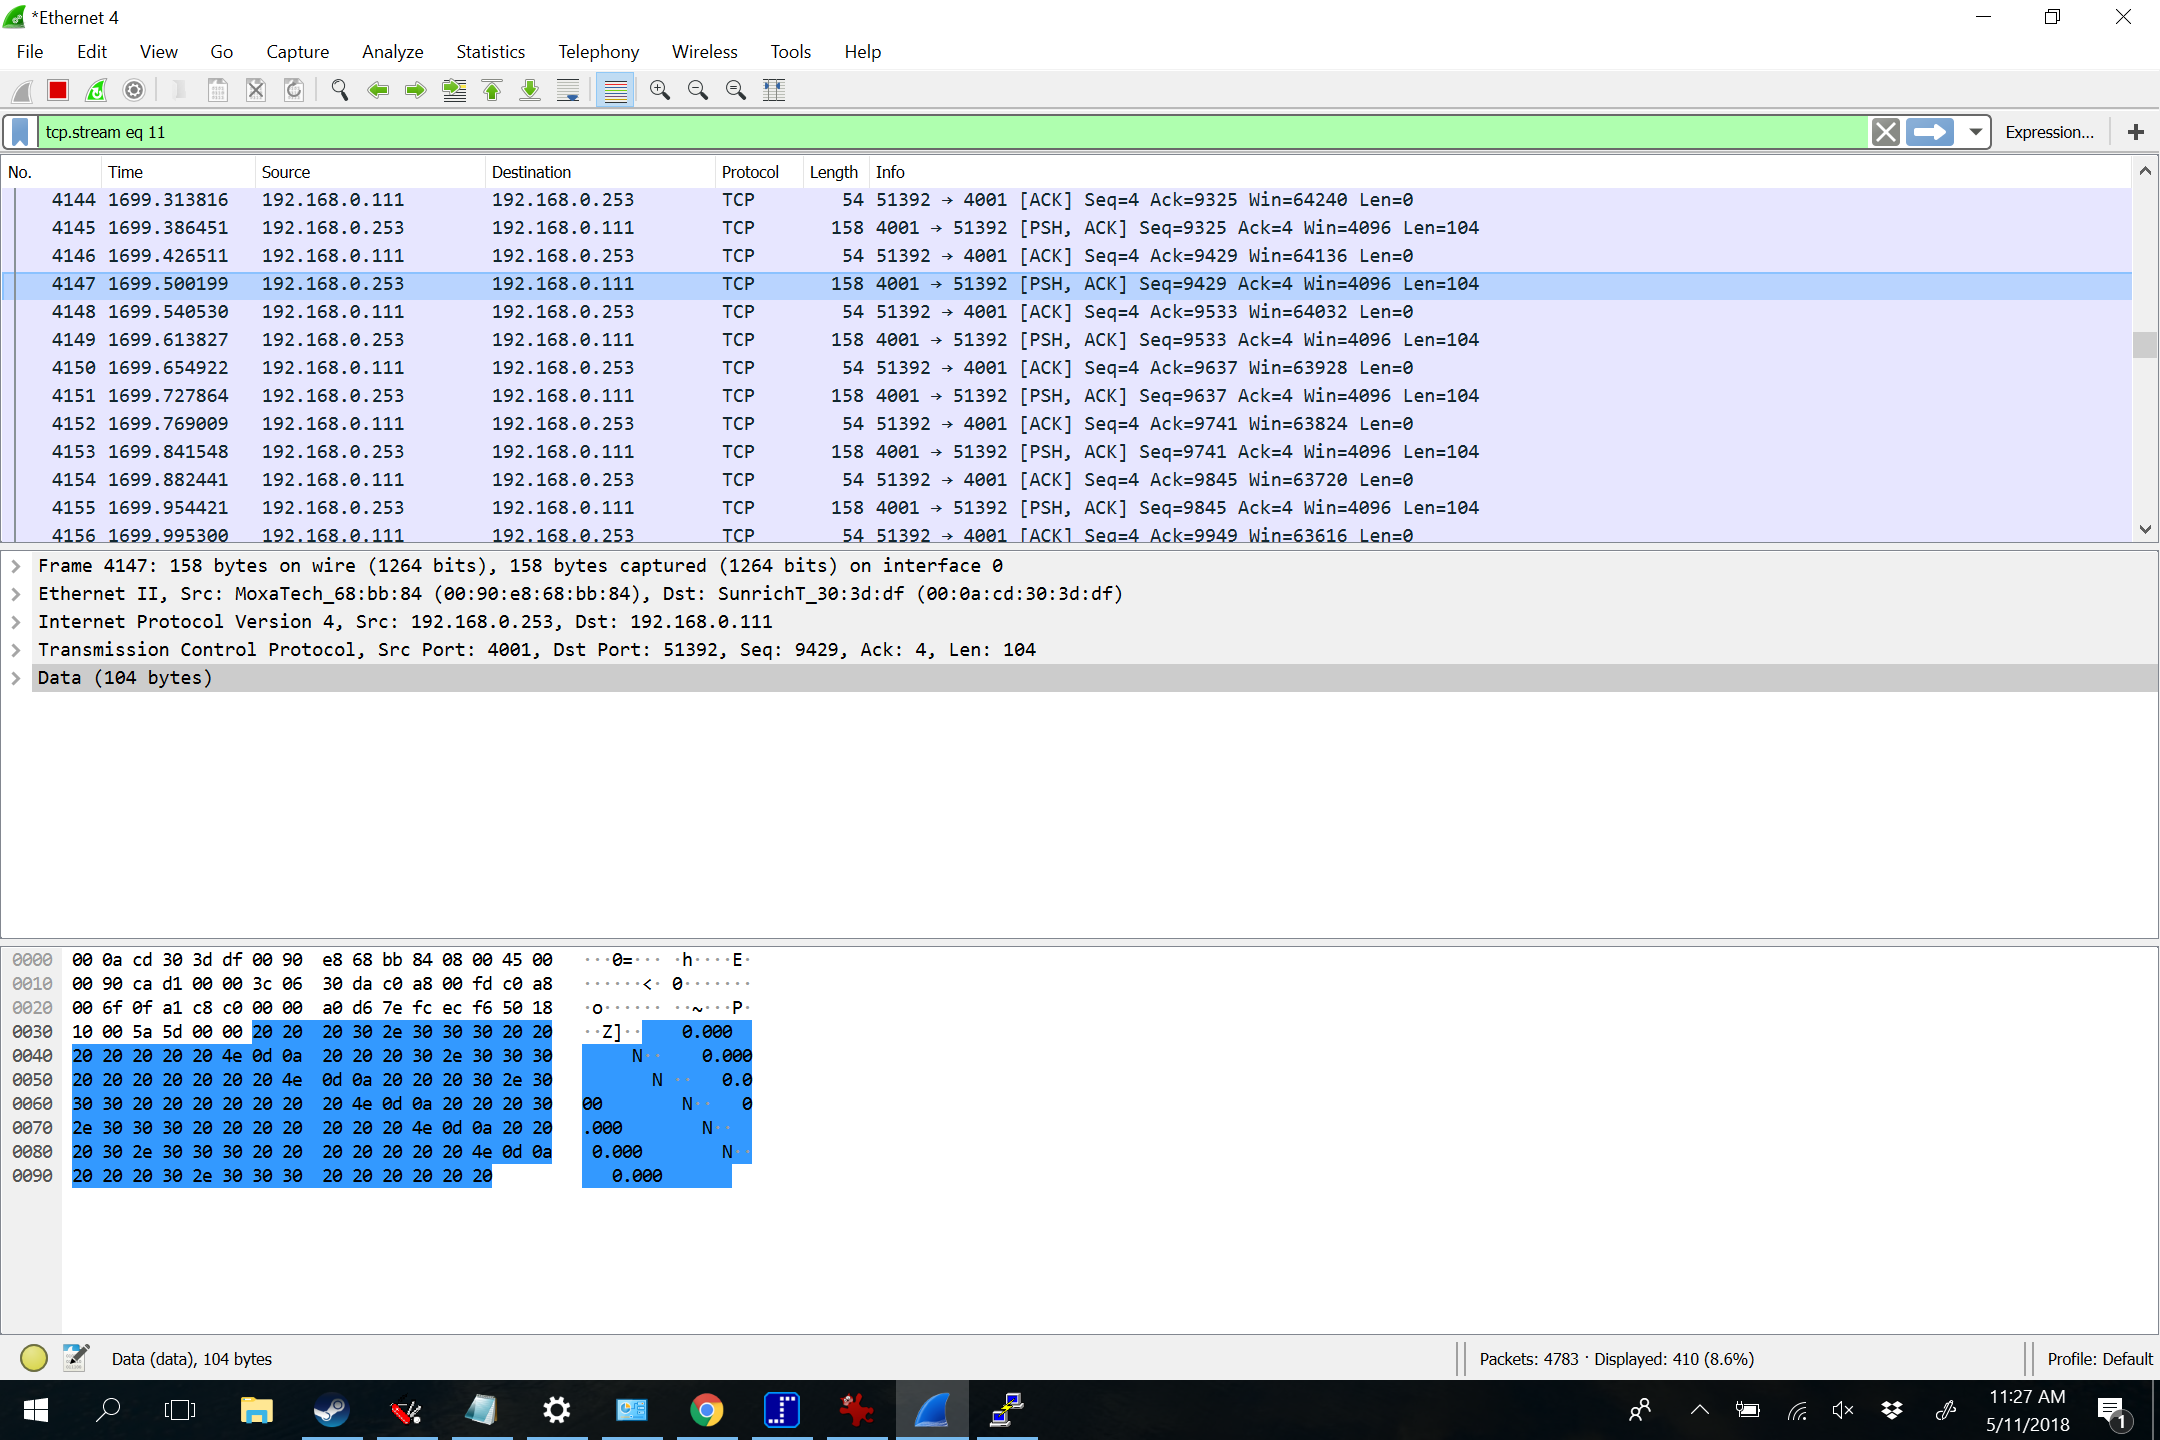
When I set the scale to continuous transmission mode (wich has no delay between the weight values), the NPort packed 104 bytes in each Ethernet frame, corresponding to almost 6 weight values (the scale sends 80 values/s):
Depending on the operating mode chosen above, you’ll have to use different programs to test the NPort 5110A. In addition to the software I’ve already mentioned above, you could use the following:
Real COM mode
A terminal program like Termite or HTerm can connect to the virtual COM port. Make sure that the connection parameters correspond to the settings of your scale.
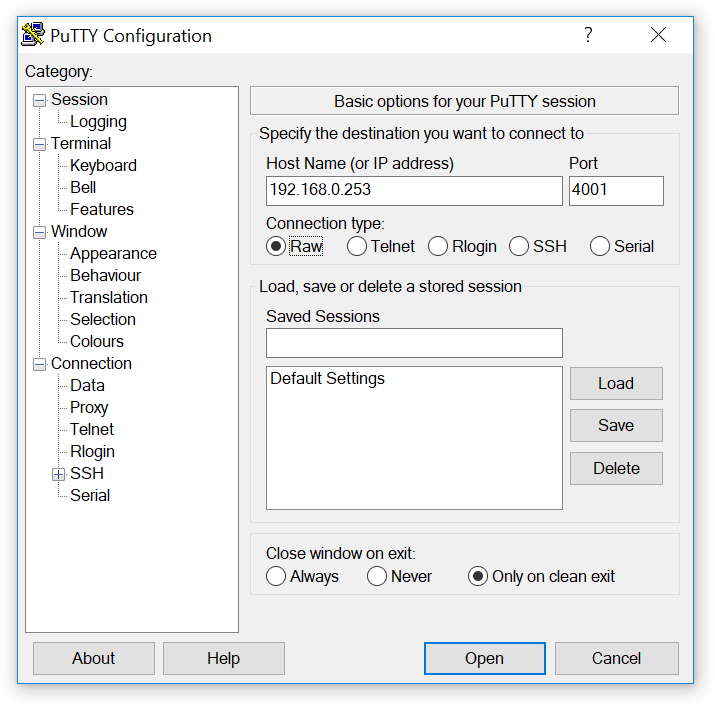
TCP Server
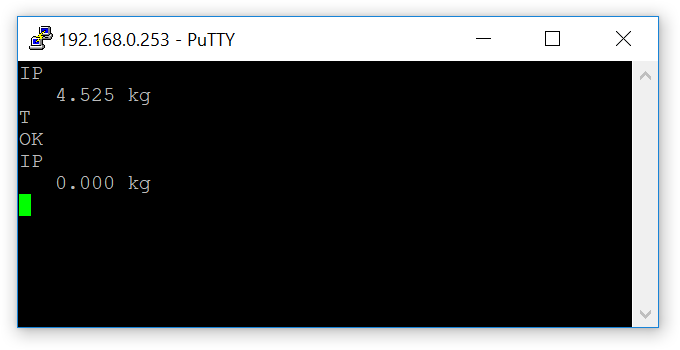
You can use PuTTY set to “Raw” TCP mode to act as a TCP client: The following screenshot shows commands sent to the scale and the replies:Another option is our free TCPTester software. It repeatedly sends a user-defined command to the scale (e.g. to request the weight). Once a reply has been received, the command is repeated:
During testing, it can be useful to observe the LEDs on the NPort:
The “Ready” LED should be green.
The “Link” LED is green when the NPort has established a 100 Mbs Ethernet connection and orange on a 10 Mbps connection.
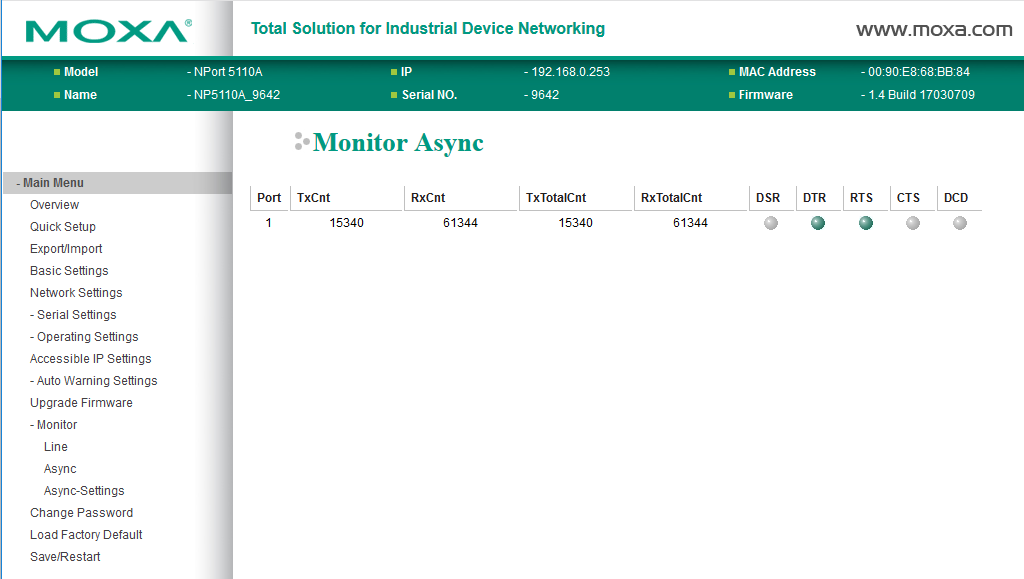
The Tx/Rx LED flashes orange when the NPort receives data from the scale and flashes green when the NPort is sends data to the scale over the serial port. Therefore, If you’re sending commands to a scale, you should be able to see it flash green. A reply from the scale would cause the LED to flash orange. If this is too difficult to see, consider using the web console to diagnose connection issues (I found it worked best in Firefox):
I hope this article has been useful. What are your experiences with Moxa’s NPort serial device servers? Please don’t hesitate to leave a comment! For support, please contact Moxa or your vendor.
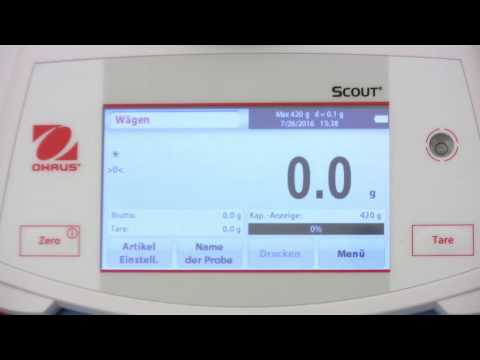
The first scale with a touchscreen display that I ever used (not made by Ohaus) took a while to start up, reacted sluggishly and – if I remember this correctly – required me to set up a user account before it would let me actually use it. That was a few years ago, but still, I was a bit skeptical when Ohaus announced that the newest model in their legendary Scout series would now have a touchscreen, too. However, after purchasing the cheapest Scout STX (the STX 421) and testing it extensively over several weeks, I can say that my worries were unfounded.
Startup time
As you can see in this short video, the Scout STX is even faster than the Ohaus Ranger 3000:
Ohaus Scout STX Einschaltdauer
Settings
How many scales can truly claim to be so easy to set up that you never have to look at the manual? As an example, here’s how you change the language: Touch “Menu”, then you’ll see 8 settings, of which “Balance Setup” looks the most promising. You’ll now see another seven settings with “Language” being the first one:
Ohaus Scout STX Sprache ändern
Should you ever find yourself somewhere you didn’t want to go, you can simply touch “Back” to go back to the previous screen.
Somewhat embarrassingly, the only thing I actually had to look up was how to change into another application mode: Instead of going through the menu, you simply touch the application name shown in the top left corner of the screen.
9 applications
The touchscreen really shines when it comes to different applications. As you can see in this video of me using the parts counting mode with auto-optimization, the STX can even replace a dedicated counting scale:
Waage Ohaus Scout STX: Zählfunktion
12 seconds into the video, you can see that the scale displays a numpad to let me enter the average piece weight or number of samples. There’s simply no way to achieve this kind of application flexibility and user friendliness without a touchscreen.
Touchscreen disadvantages
One common complaint about touchscreens is the lack of tactile feedback. Fortunately, the most frequently used buttons on any scale, ON/OFF/Zero and Tare, were still kept as physical buttons on the Ohaus Scout STX.
You also have to consider that the fairly large screen needs a lot of power. The Scout STX can be used with four AA batteries, but those won’t last more than a few hours (6 according to Ohaus). It’s certainly a good idea to use the included power adapter whenever possible.