From May 15th through December 31st, 2019 (or while supplies last), you can get a free starter kit when purchasing an Ohaus MB120 moisture analyzer. (promotion valid in the US and Canada only). The kit contains the following items:
Temperature Calibration Kit (11113857)
Glass Fiber Filter Pads (80850087)
Sample Pans (80850086)
To get you starter kit, fill out this form on Ohaus’s website and upload a copy of your invoice. Redemption must be made within 6 weeks of your purchase of the Ohaus MB120. Click on the link above for further information.
About the Ohaus MB120 moisture analyzer
The Ohaus MB120 moisture balance has a capacity of 120g and a readability of 1mg, allowing you to determine moisture content in 0,01% increments. Its 4.3″ TFT color touchscreen display offers step-by-step user guidance. It is the most advanced moisture analyzer currently available from Ohaus.
OHAUS Moisture Analyzers - MB120 and MB90: Features (EN)
“Simplifying even the most complex industrial applications” is the claim that Ohaus makes in their data sheet. Is it justified? After spending some time trying out the different functions of this scale, I believe that yes, it is.
The key to understanding the power of the Ohaus Ranger 7000 scales are the 10 application modes:
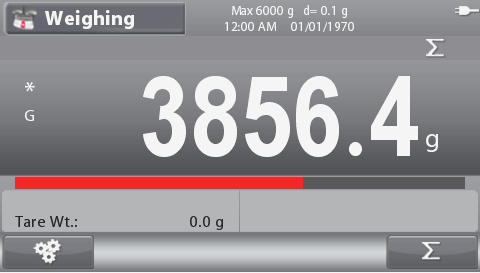
Weighing: Determine the weight of items (no surprise here). A statistics feature can be used in weighing mode to calculate statistical data.
Counting: Count parts of uniform weight. Auto-optimization recalculates the average piece weight as the number of pieces is increased.
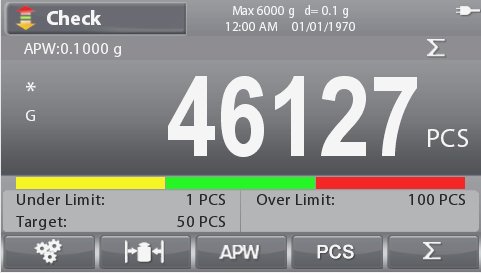
Check weighing and check counting: Compare the weight or count of a sample against target limits. Connect with discrete I/O option kit to use external check lights.
Formulation: For compounding and recipe making. Compensation can be used in case a component is overfilled (outside the tolerance).
Percent weighing: Measure the weight of a sample displayed as a percentage of a pre-established reference weight.
Filling: Fill a container to a target weight. Progress bar displays filling status. Connect with discrete I/O option kit to control a semi-automatic filling system.
Dynamic weighing: Weigh an unstable load. Scale takes an average of weights over a period of time. Can also be used as a display hold function.
Density Determination: Determine density of solids.
Differential weighing: Calculate the difference between sample weights and initial weights.
Sieve analysis: Used to assess the particle size distribution (also called gradation) of a granular material.
Each application is displayed differently on the 4.3 inch color screen. Compare, for instance, the display in weighing mode to check counting mode:
WeighingCheck counting
The applications are not limited to different presentations:
Five physical smart buttons below the display take on different functions depending on the application.
All settings relevant to the current application can be accessed easily by pressing the settings button.
The internal library allows you to save application specific data for commonly used items (e.g. the target weight and tolerance for check weighing, the average piece weight in counting mode or the set points in filling mode). The scale can be connected to a bar code reader to simplify recalling data from the library.
An optional I/O kit with four outputs (relays) and 2 inputs can be used to integrate the scale with external devices. The functionality is again dependent on the application mode. One of our customers has used the filling application with the I/O kit to build filling machines controlled entirely by a Ranger 7000 scale.
Therefore, as long as your application is supported by the scale, it does an excellent job at simplifying many tasks.
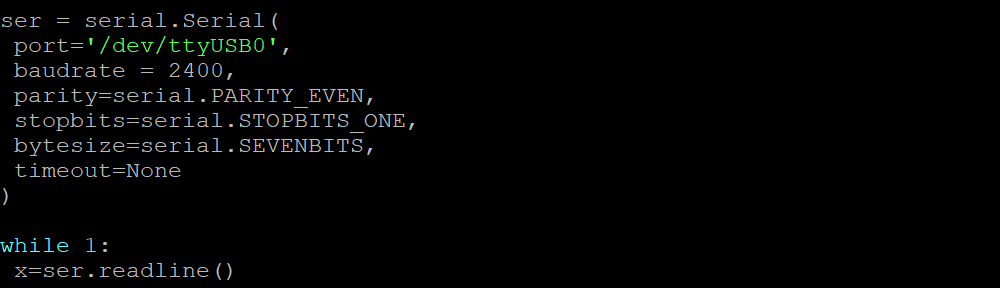
Python and pySerial make it easy to read weight data from a scale
On the Pi, I used Python with pySerial to read the weight from the scale. The script I put together is trivially simple. You can download it here or just type it on the Pi:
By pressing the PRINT-Button on the scale, I then sent a few weight values to the Pi and the script wrote them to the terminal (b’ is added by Python):
In a more useful application, you would want to parse the data sent from the scale to get the weight as a number and then do something with it (maybe write it to a database). You could also do interesting things with the GPIO on the Pi like sounding an alarm when a certain weight is exceeded (though a microcontroller might be better suited for this).
I then switched the scale to “stream mode” (continuous transmission) where it sent 10 values per second (stable or not). The output you see below is the result of placing a single object on the scale and waiting for it to stabilize:
I hope this example shows that it can be really easy to transfer the weight from a scale to a Raspberry Pi.
Notes on scales and the Raspberry Pi
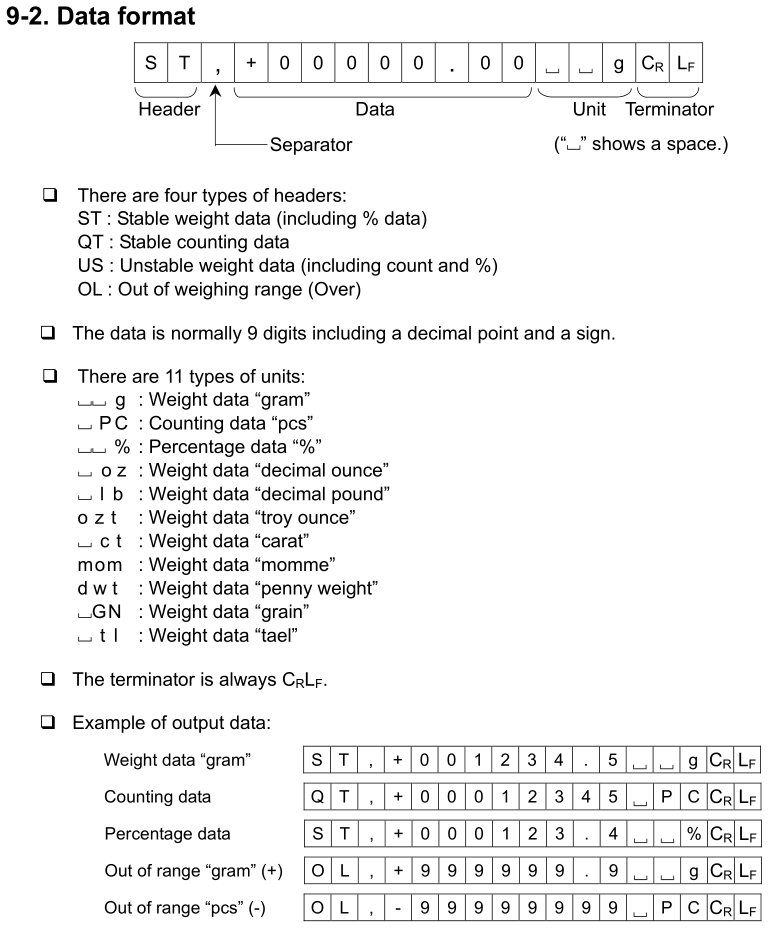
One advantage of A&D scales is that (almost) all of them use the same data format and interface parameters and that you’ll find a good description in the manual:
However, you could use also use scales made by other manufacturers as long as they come with an RS-232 interface and the ability to send the weight in ASCII format. Available data output modes vary, so please read the product description carefully before buying.
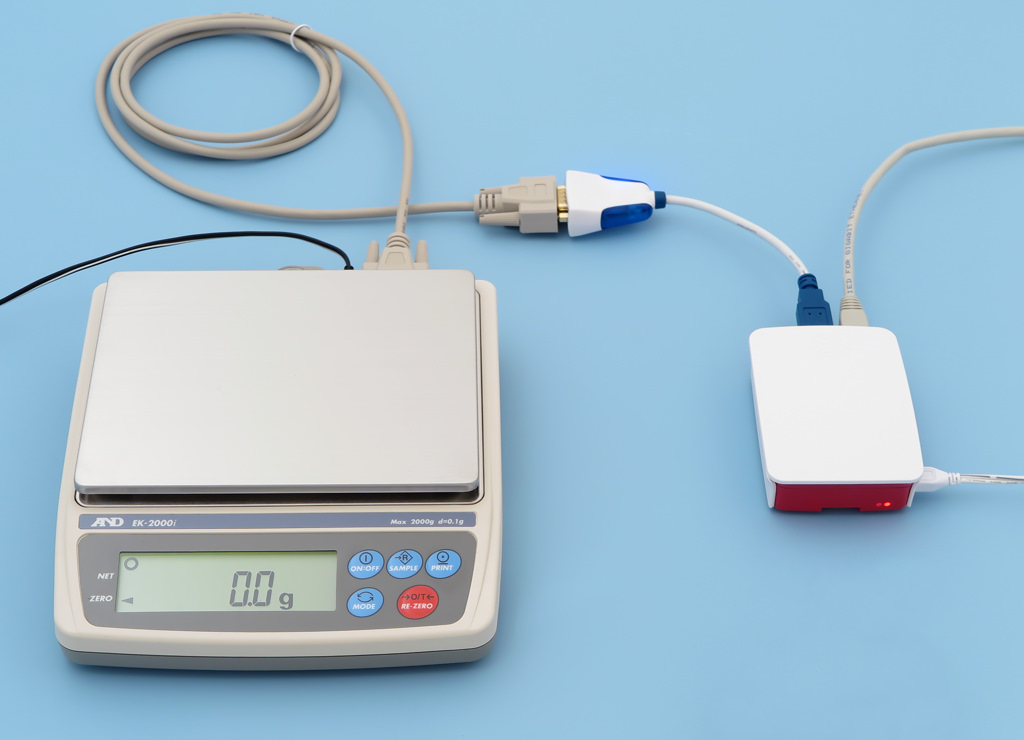
A converter like the one I used is already built into some scales, which means that you can directly connect them to the Raspberry Pi via USB (you won’t need a serial cable). You’ll find many Ohaus scales with this interface option and the ones I’ve tested worked fine. However, cheaper scales with a USB interface can often not be used with pySerial as they do not emulate a serial port. They can also present other challenges (e.g. data that is not transmitted in human-readable ASCII format).
You do of course not have to use Python, just make sure that your preferred programming language can communicate over a serial port on the Pi. The book Raspberry Pi with Java: Programming the Internet of Things (IoT) contains projects using Ohaus scales and, well, Java.