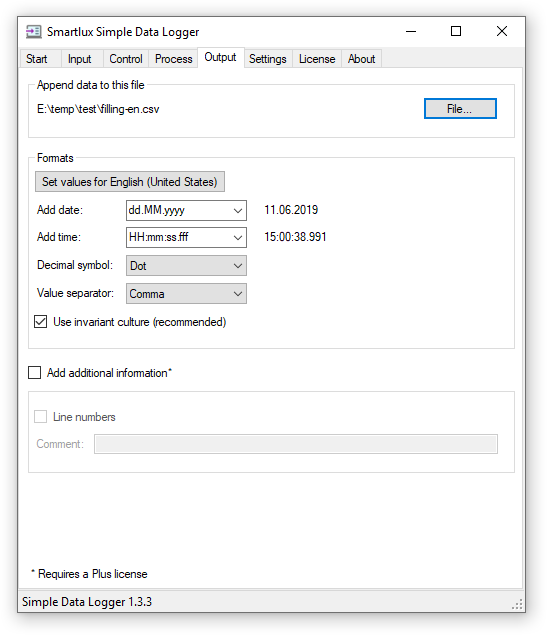
It can add the date and time and further information to the captured weight values. It supports connections over COM ports (RS-232, USB virtual COM port, Bluetooth SPP) and TPC/IP (acting as the client).
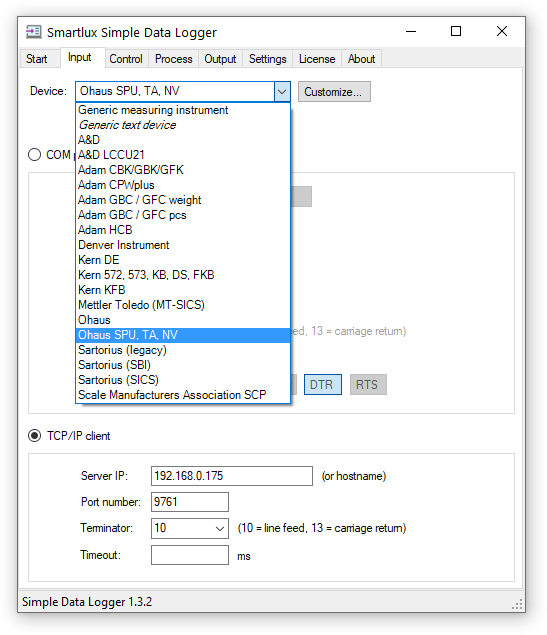
SDL comes with many profiles for popular scales and balances. Advanced features include the ability to request the weight from the scale in user-defined intervals (polling).
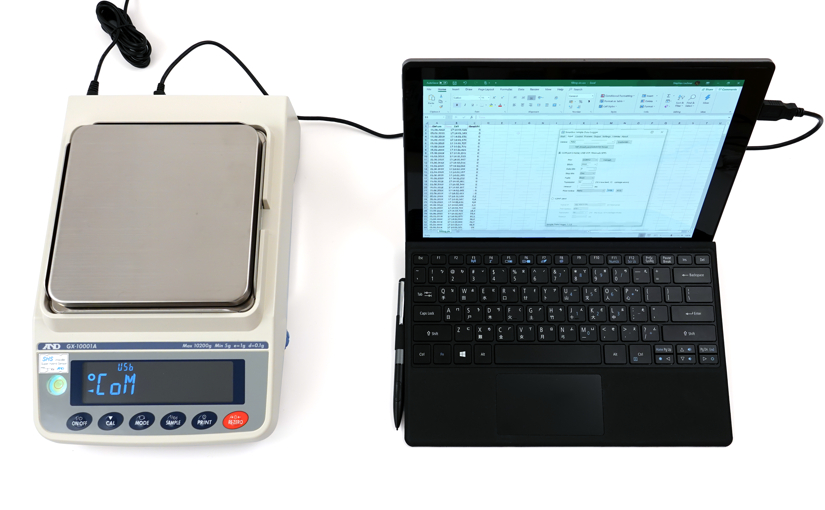
The CSV files generated by Simple Data Logger can be easily opened in Microsoft Excel and other applications for further processing and data visualization.
Here you will all of our articles about Simple Data Logger.
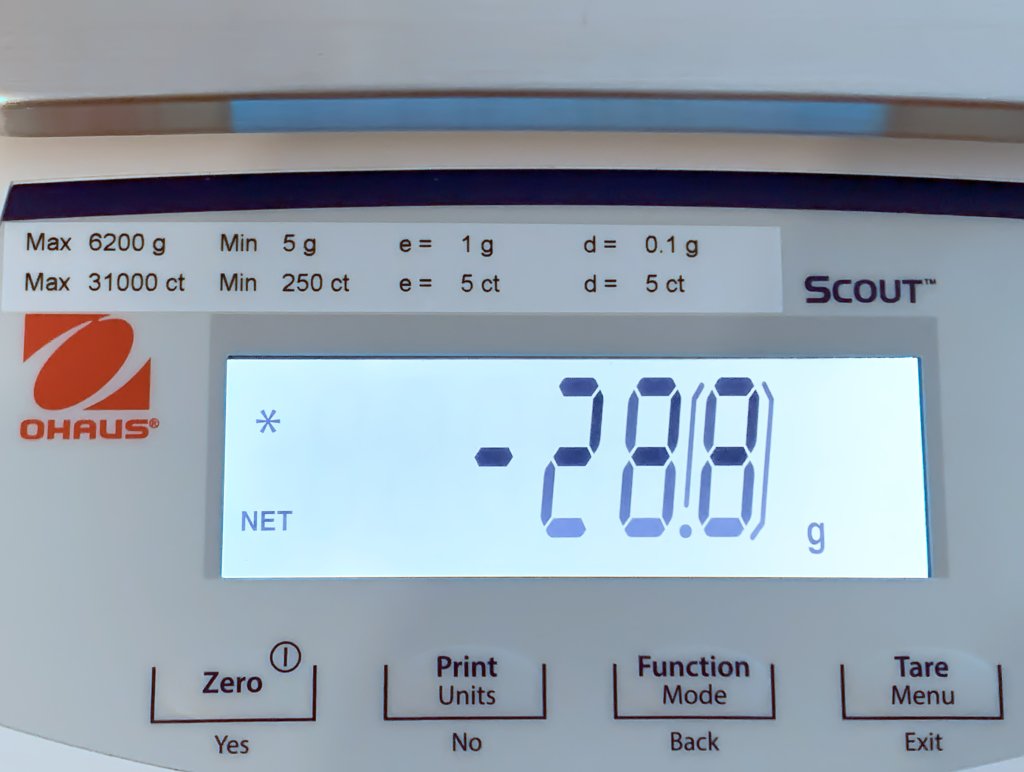
Most class I and II weighing instruments use what is called an “auxiliary indicating device” with a “differentiated scale division”1: On the display, the final digit or digits are visually distinct from the others. This is also the case with Ohaus SJX scales that have been verified (e.g. the SJX6201M):
Note how the scale division (d) is one tenth of the verification scale division (e) when weighing in g
This digit is enclosed in square brackets when the weight is sent over one of the optional interfaces (such as RS-232, USB, or Ethernet). Example:
1234.[5] g
By default, our software does not capture a digit that comes after a non-numeric character. This can be easily fixed in two steps. We’ll use screenshots from Simple Data Logger as an example, but the procedure is basically the same for our 232key virtual keyboard wedge software2.
1. Change the regular expression used to capture the weight
In the Input tab, click the Customize button and replace the regular expression with the following one:
(-*[0-9]*\.?[0-9]*\[[0-9]+)
This will ensure that the opening square bracket and the last digit are also captured (shown in blue in the Event Log):
Remove the bracket
The string we’ve now captured is not a number because it contains a bracket. Writing it to a file like this would make things complicated when processing the data later.
Fortunately, you can easily remove the bracket: Go to the Process tab, check Enable Editing, and enter the opening square bracket “[” in the Remove characters field:
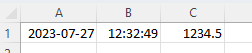
SDL will now properly write the complete weight as a number to the CSV file, which can be opened in Excel or other programs:
Important: If you are utilizing our software in connection with a verified scale, please ensure that such usage is compliant with the regulations and requirements of your local jurisdiction.
Milliseconds are not first-class citizens in Excel. There’s no MILLISECOND equivalent to the SECOND function and you will not find a predefined time format that includes hours, minutes, seconds and milliseconds.
This does not mean that Excel cannot process time values with milliseconds. The only requirement is that they are in a format that Excel recognizes. You should also assign a custom format to the cells so that you can easily read the values. I will explain these two aspects in this article and present solutions to common millisecond related tasks and problems. If you’re only interested in a brief summary, jump to the TL;DR at the end.
Note: I’m using US region settings for this article. Other regions may require different formats, e.g. “hh:mm:ss,000” for Germany (with a comma instead of a dot).
Time formats with milliseconds recognized by Excel
Internally, Excel stores time values as fractions of a day (24 hours). This means that 12h are represented as 12÷24 = ½ = 0.5 (half a day) and 3h as 3÷24 = 0.125. In this representation, 1ms is only a tiny value: 1ms ÷ (24h × 60min/h × 60s/min × 1000ms/s) = 1÷86400000 ≈ 0.000000011574074 (compare this to the numeric precision of Excel).
This makes the calculation of time differences very easy, but entering values in this way is not particularly user friendly. Fortunately, Excel also recognizes the following format and similar variants:
hh:mm:ss.000
Example: “01:23:45.678” stands for one hour, 23 minutes, 45 seconds and 678 milliseconds. You do not have to type leading zeros (or trailing zeros in the milliseconds part).
Numbers entered like this or read from a file in this format are converted to fractions of a day. However, they are not displayed correctly until you assign a corresponding custom format to the cells, as explained below.
The time format pattern in this software is slightly different from the one used by Excel. To the right of the “add time” field, you can see that it produces the desired output.
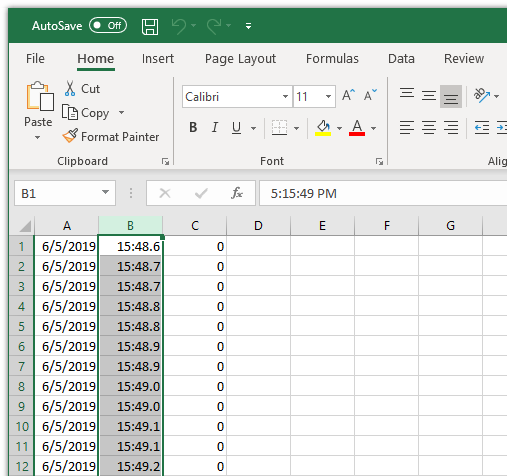
After opening the CSV file in Excel, you will notice that the time is not displayed correctly:
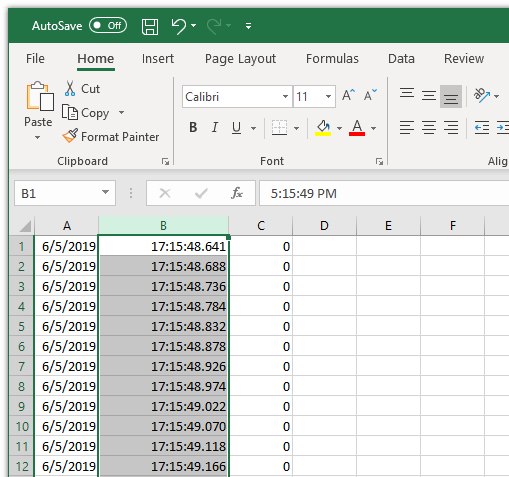
This can be fixed by assigning the following custom format to the cells (select the column containing the time, right-click and choose “format cells”):
hh:mm:ss.000
Once applied, the time values are shown in the desired format:
Common tasks when using milliseconds in Excel
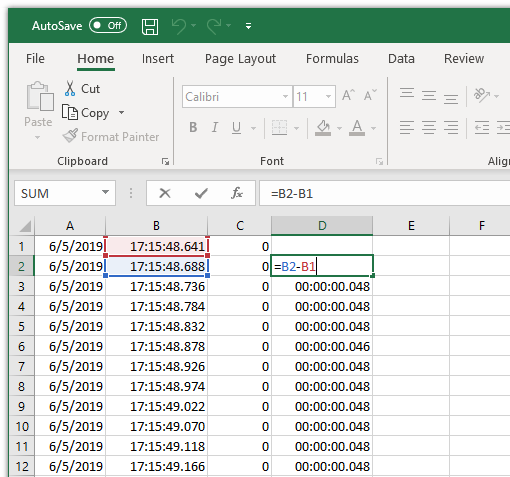
Calculating time differences
Thanks to the numeric format used internally by Excel, you can perform all kinds of calculations with time values. To calculate a time difference, simply subtract the later time from the earlier one:
If the result consists of “############” instead of the expected time difference, there can be several reasons:
You may need to apply the same custom hh:mm:ss.000 format as above to the results.
If your calculations exceed 24h, use the [hh]:mm:ss.000 “elapsed time” format.
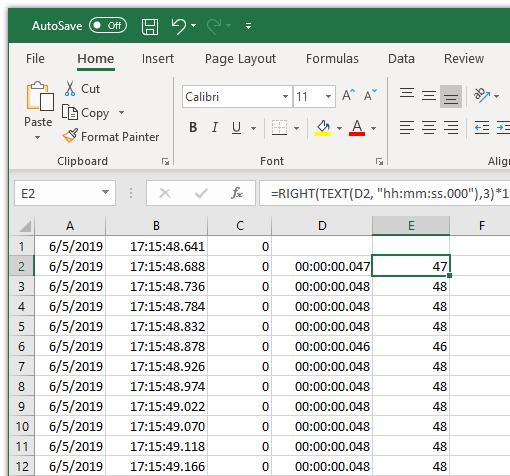
Excel does not have a MILLISECOND function to return only the milliseconds of a time value. You can use the following formula instead:
=RIGHT(TEXT(D2, "hh:mm:ss.000"),3)*1
This takes the 3 rightmost characters (the milliseconds) from the D2 cell and multiplies them by one to ensure the result is treated as a number (not text).
Format the cells in the result column as a number without decimal places and you will see that only the milliseconds have been extracted:
You can then easily perform calculations such as MIN, MAX, STDEV.P, etc.
Conversion of time values into milliseconds
If you want to convert entire time values to milliseconds instead of just extracting the milliseconds part, there are two approaches that should lead to the same result.
You can use the built-in HOUR, MINUTE and SECOND functions together with our MILLISECOND function replacement (see above) to convert a time value (in cell D2):
There is also an elegant alternative to this solution: You can simply multiply the time value by 86400000 to convert it into milliseconds. This works because of the internal numeric format used by Excel where 1 is equal to 24h = 24h × 60min/h × 60s/min × 1000ms/s = 86400000ms.
Use an easier format to manually enter times with milliseconds
The time values with milliseconds used for the examples above were already available in the “hh:mm:ss.000” format required by Excel. But what if you must enter many time values manually? Maybe you prefer a format that only uses dots so you can keep your hand on the numeric keypad, e.g. 1.25.54.010 instead of 1:25:54.010.
For Excel to recognize these values as times, they must be converted to the “hh:mm:ss.000” format. However, if you use the SUBSTITUTE function to replace all dots with colons, you wont preserve the last dot. The solution is to limit SUBSTITUTE to replace only the first occurrence of a dot and then apply it again to replace the second dot, leaving the last one intact. The required formula looks complicated but is actually simple (it assumes the value you want to transform is contained in cell A2):
=SUBSTITUTE(SUBSTITUTE(A2,".",":",1),".",":",1)
Please try it out before you manually enter hundreds of time values using the dot format. It worked fine for me:
TL;DR (too long, didn’t read)
Make sure that your time values are available as hh:mm:ss.000, e.g. “01:23:45.678”.
Assign the following custom format to your cells: hh:mm:ss.000.
The new Ohaus Navigator series consists of a total of 18 scales (incl. 4 LFT models) with a maximum capacity from 220g up to 22kg and a readability starting at 0.01g. As usual in this segment, all scales use load cells with strain gages.
Scale
Capacity [g]
Readability [g]
NV222
220
0.01
NV422
420
0.01
NV622
620
0.01
NV221
220
0.1
NV621
620
0.1
NV1201
1200
0.1
NVT2201
2200
0.1
NVT6201
6200
0.1
NVT2200
2220
1
NVT6200
6200
1
NVT12000
12000
1
NVT22000
22000
1
LFT scale
Capacity [g]
Readability [g]
NVT1601M
1600
1
NVT3200M
3200
2
NVT6400M
6400
5
Note: Available models and characteristics may differ depending on your region. This article refers to scales available in Europe as of May 2019.
Differences to the previous Navigator scales
The NVL series (Navigator XL) with its unusual elongated shape is no longer available:
From left to right: Old Navigator XT scale (NVT), old Navigator XL scale (NVL), old Navigator scale (NV)
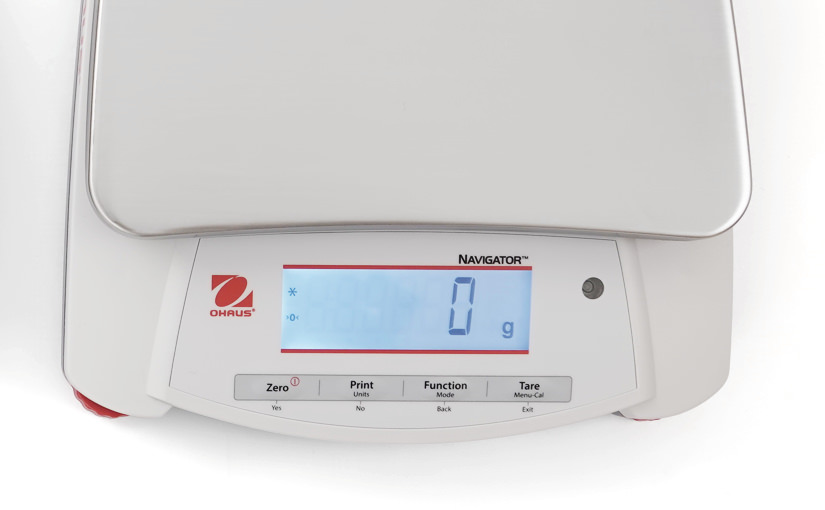
On all new scales, the upper side of the housing is now white, and the red display framing is more discreet. Another difference is the even higher contrast of the display:
Old NVT scale (left) and new NVT scale (right)
The touchless IR sensor has been removed from all scales except the LFT models.
Interface options and accessories continue to be available
Numerous interface options are available, making these scales particularly interesting for data transfer to a computer: RS-232, USB device (virtual COM port) and Ethernet.
Ohaus Navigator scale with optional USB interface installed
Ohaus Navigator device profile in Simple Data Logger (SDL)
As standard, all scales are supplied with a plug-in power supply and can alternatively be operated with batteries. An optional lead battery is also available for the larger NVT models.
A carrying case is available to make the scales even more portable:
Ohaus Navigator carrying case (30467963)
Further information on the new 2019 Ohaus Navigator scales
Note: The photos for this article were not provided by the manufacturer. If you would like to use them on your website or in other publications, please contact us to acquire a license.