RS-232 Basics (Part 1): Scale Pinout and Cable Wiring

RS-232 has been around since the 1960s, so it seems appropriate to start this article with a communication method that’s even older: the tin can phone.

The kid on the left is speaking into a can held in front of their mouth (transmitting data, TD), while the other is listening through a can held to their ear (receiving data, RD).

To enable both kids to speak (TD) and listen (RD) at the same time, they would require a second set of cans connected by a string, represented by the red arrow1. Let’s also mark the ground (GND) in green:
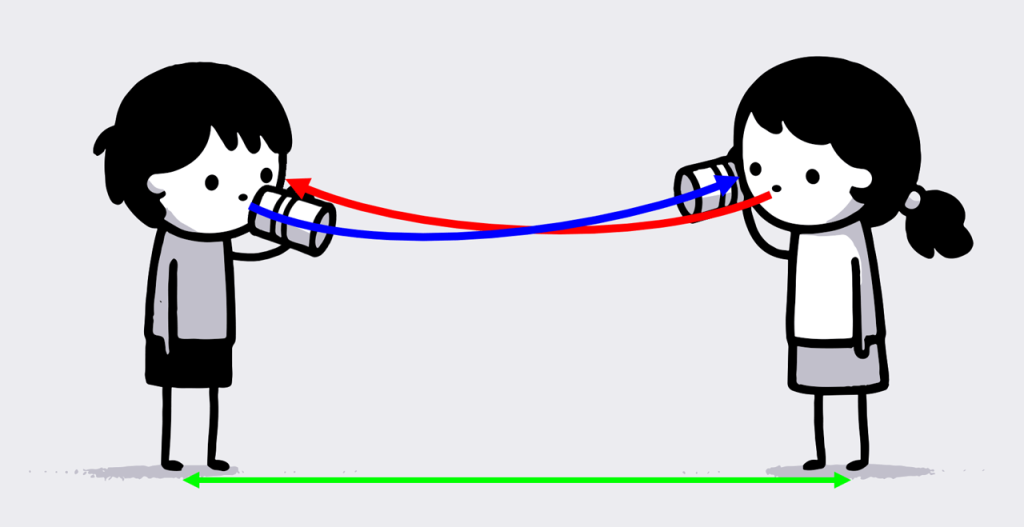
At this point, the illustration looks similar to what you might find in the RS-232 section of your scale’s user manual2:
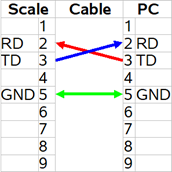
RS-232 schematic: Scale to PC connection using a crossed cable

To establish bidirectional communication with this scale, you would need to connect the transmit data pin (usually called TD or TXD) to the receive data pin of your computer (RD or RXD) and vice versa. Additionally, it’s essential to connect the ground pins (GND) for reference3.

Although this seems simple, attempts to establish communication with a scale using RS-232 often fail at this basic stage.

To understand why this is such a common problem, take a look at the photos of the RS-232 interface of A&D’s popular FX-120i balance and Radwag’s PUE C32 weighing indicator:
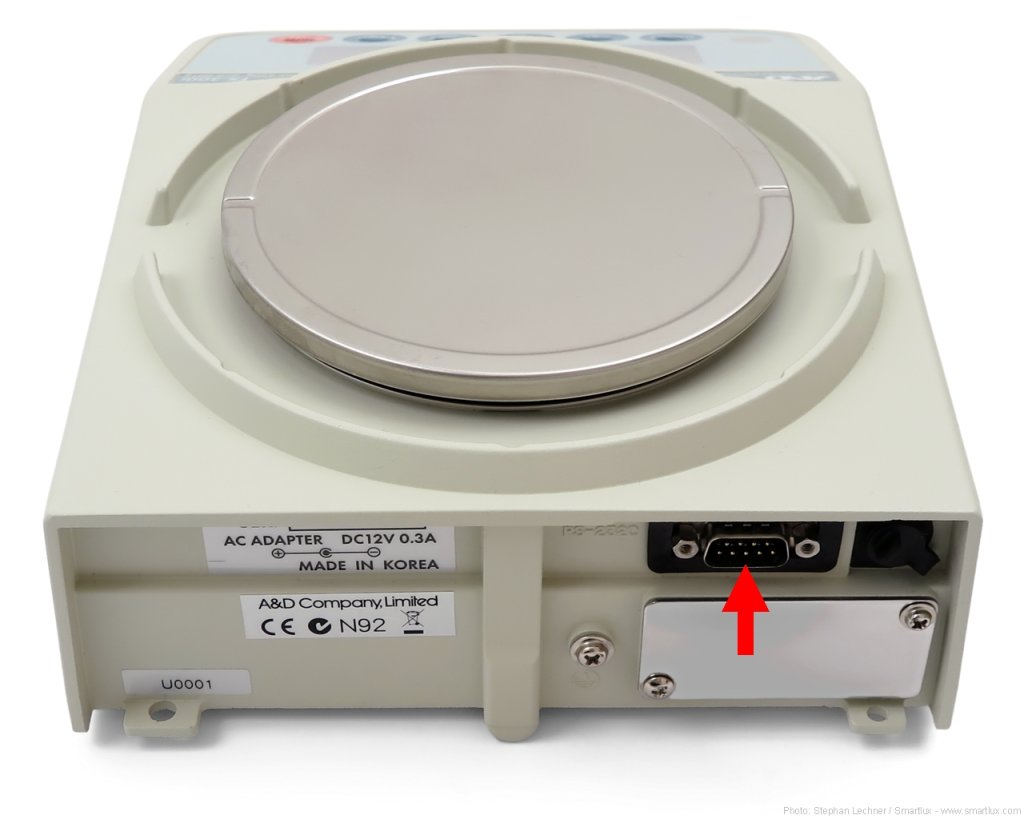
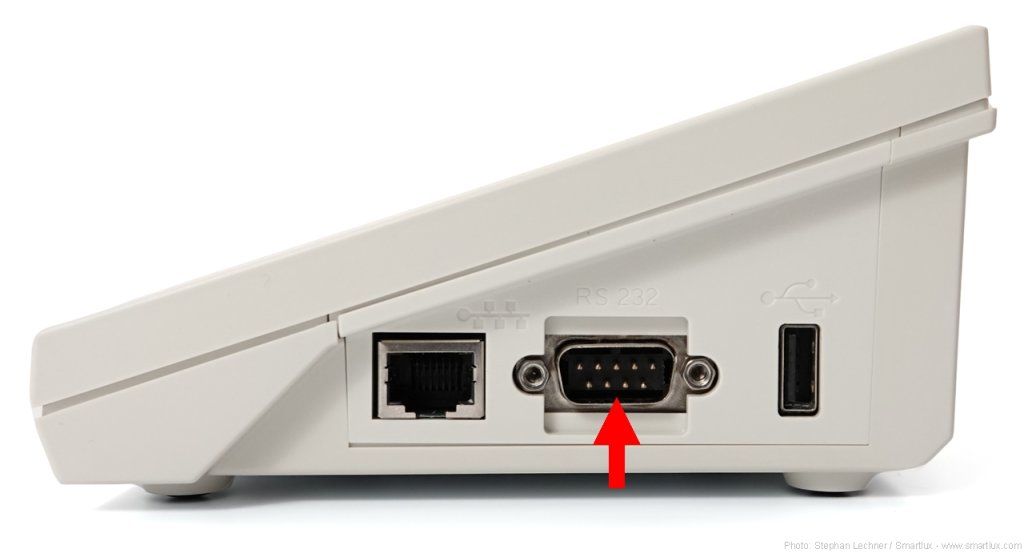
Both weighing instruments have a male D-sub port with 9 pins (DE-9M, frequently but incorrectly called DB-9M)4. You might therefore think that they can use the same cable. You would be wrong, as their pinout is not identical:
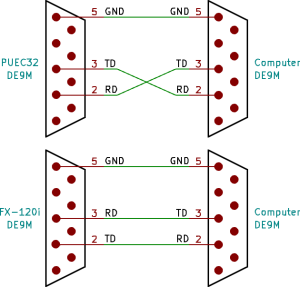
Radwag’s PUE C32 receives data (RD) on pin 2 and transmits it on pin 3 (TD), requiring a crossed cable when connected to the standard DE-9M port of a PC. A&D’s FX-120i receives data on pin 3 (RD) and transmits it on pin 2 (TD). It requires a straight cable.

RS-232 cable terminology

Null modem cables are also known as crossover or crossed cables. They cross-connect certain pins, such as RD and TD.

Straight cables run straight through and are also called straight-through cables or 1:1 cables.

There are other types of serial cables, but these two are most common.

If you use the wrong type of cable, you connect TD to TD and RD to RD. This would lead to a situation like the one illustrated below, where both kids are holding the cans to their ears and no communication is possible:

While we can immediately recognize that something is wrong in this picture, no one can tell a straight cable from a null modem cable just by looking at it:
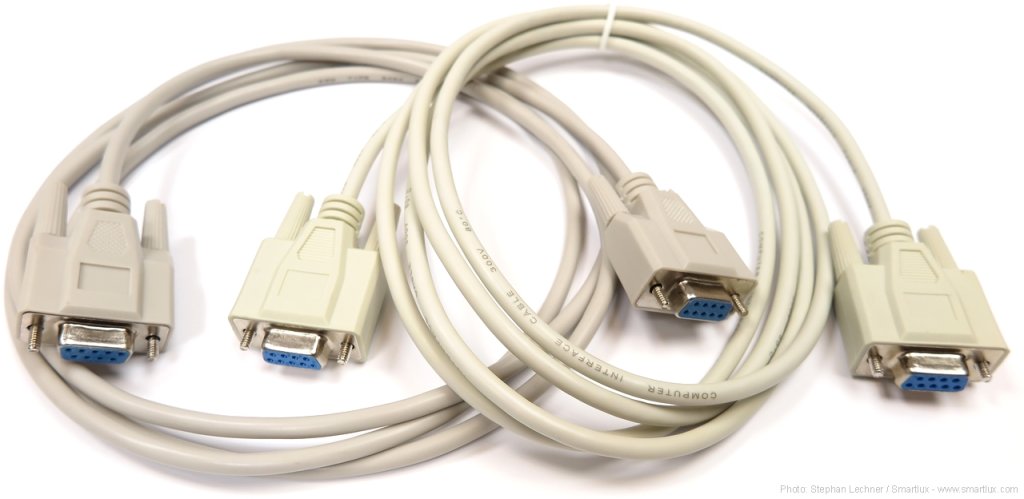
Key takeaways: The fact that you can plug in a cable means nothing – it’s the pinout of your weighing instrument and the wiring of your cable that matters.

If the electrical connection between your scale and computer is not established correctly, it does not matter which software you use. It will not receive any data.

There are many more aspects of RS-232 communication to explore – we’ll do that in future articles. In the meantime, don’t hesitate to leave a comment, but please understand that I can’t remotely diagnose communication problems for free.


1Bidirectional communication on a single string is technically possible but doesn’t seem very practical.

2Did you notice that this schematic doesn’t tell you the gender of the port (DE-9M or DE-9F)? While it was just a simplified example, many actual user manuals omit this information as well, adding to the general confusion surrounding RS-232.

3Some scales and balances require connections between other pins. This is an advanced topic for a future article.

4RS-232 ports on scales come in many different forms and are not limited to DE-9M. You’ll frequently encounter DE-9F, DB25 (especially on older balances), RJ11, RJ45, and many others.

A&D EK-i/EW-i scales: Changing the data transmission mode

The scales are equipped with an RS-232 interface and can be connected to a PC for data acquisition (if necessary via an adapter from RS-232 to USB). They are known as “Everest EK/EW compact balances” in the US.

Applications such as the following can be used to capture the weight:

  • Simple Data Logger (writes the weight to a file with date and time),
  • 232key (enters the weight as simulated keystrokes directly into another application),
  • WinCT (a collection of 3 applications from A&D),
  • LabVIEW,
  • any terminal software (useful for testing data transmission).

Data transmission modes

EK-i and EW-i scales support the following transmission modes:

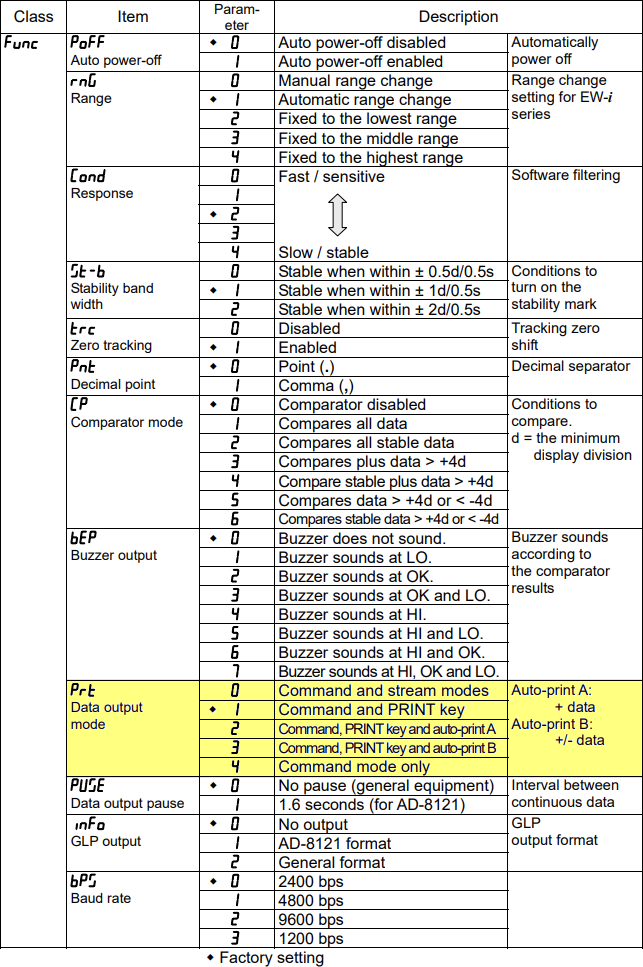
  • Prt 0 – stream mode: continuous transmission of weight with approx. 10 values/s,
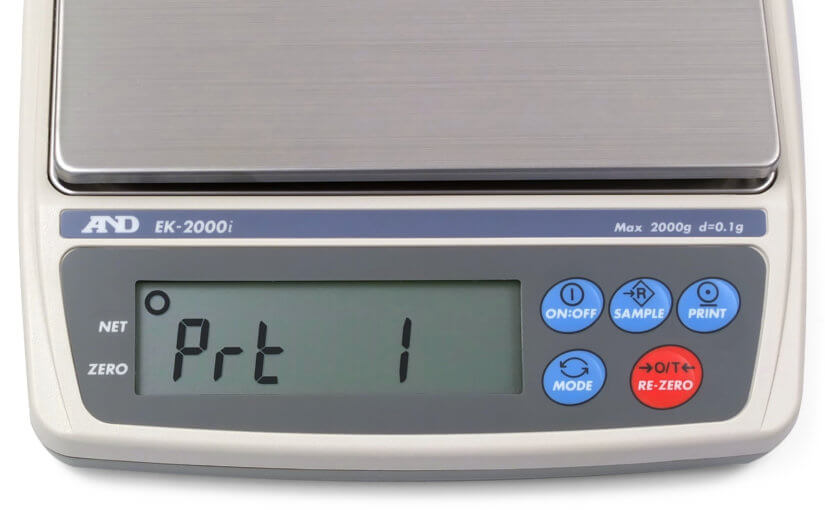
  • Prt 1 – PRINT key (default setting): transmission when pressing the PRINT key on the scale,
  • Prt 2 – auto-print A (positive values only): automatic single transmission when the weight is stable (return to zero required before next transmission),
  • Prt 3 – auto-print B (positive and negative values): automatic single transmission when the weight is stable (return to zero required before next transmission),
  • Prt 4 – command mode only: request-response mode, the computer sends a command to the scale and it responds with the weight value.

Notes:

  • The display flashes briefly (in Prt 1, 2 and 3) to confirm the data output.
  • Commands from a connected computer can be sent in all modes.
  • The PRINT key is active in all modes except Prt 4.
  • There is no interval mode. If you want to capture the weight in certain intervals (e.g every minute), you need a software that supports polling with a timer (or you could set the scale to stream mode and discard most values).

These data output modes can be found in the Func class of the scales’ menu:

Excerpt from the user manual (see link below)

Changing the transmission mode

  1. Turn on the scale.
  2. Press and hold the SAMPLE key until the scale displays “P-3.00” (or a similar value). The scale shows “Func” next.
  3. Press the PRINT key to enter the function settings menu. The first setting “PoFF” is displayed.
  4. Press the SAMPLE key 8 times to enter the “Prt” setting. By default, “Prt 1” is set.
  5. Set “Prt” to the desired value by pressing the RE-ZERO key (see description above).
  6. Confirm the setting with PRINT. The balance displays “End” briefly and then “CP Hi”.
  7. Restart the scale by pressing the MODE key.

Further information

A&D EJ-120 precision scale: Zero point calibration with the density determination kit

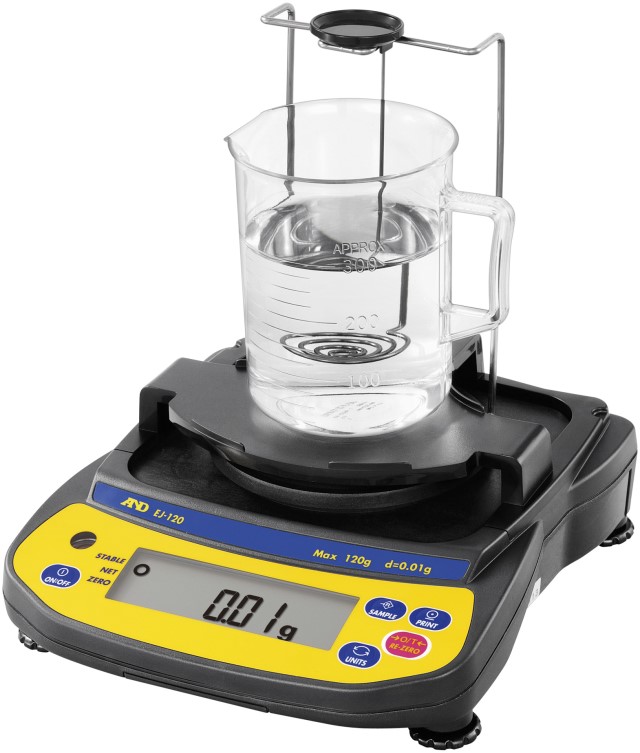
Some of the scales from A&D’s EJ series (known as “Newton” in the U.S.) can be equipped with an optional density determination kit (EJ-13), as shown in this photo provided by A&D:

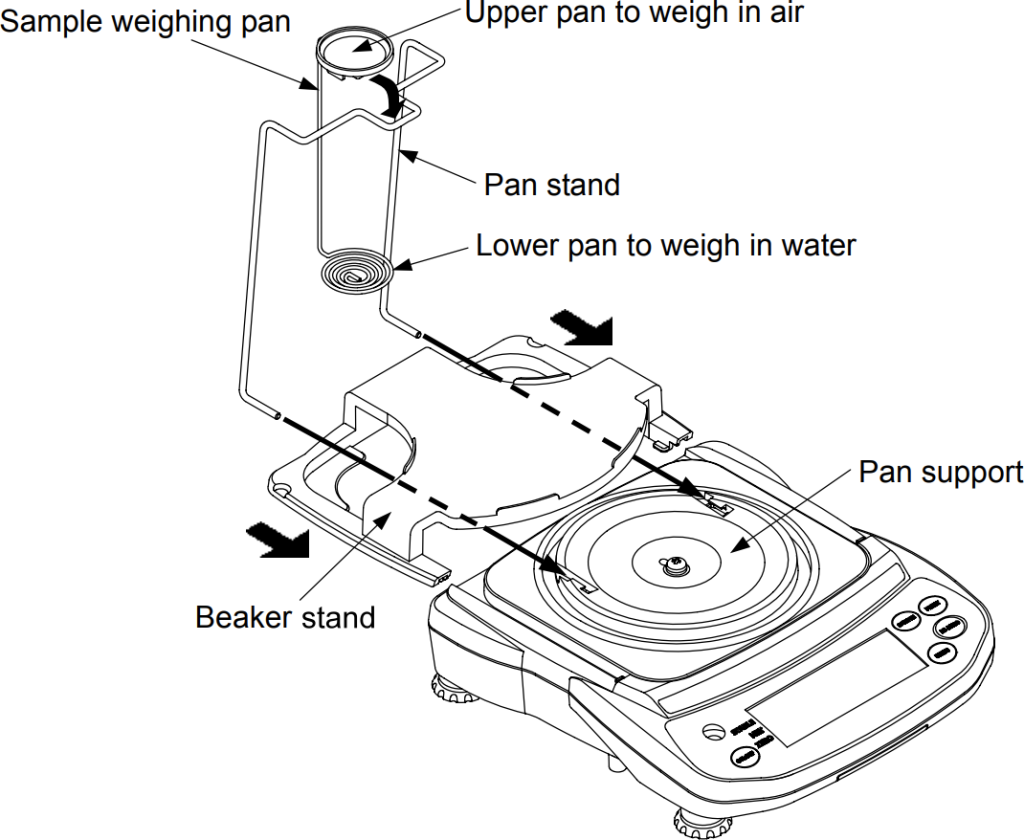
The stainless steel weighing pan supplied with the scale is removed when the density determination kit is installed. Instead, a pan stand and a special double pan are used to weigh samples in the air and in a liquid.

The problem: these two parts weigh just 38.5 g, while the stainless steel pan weighs about 55 g, a difference of 16.5 g. The manual states, “the range for power-on zero is within ±10% of the weighing capacity around the calibrated zero point.”

For the EJ-120 with a capacity of 120 g, this is only ±12 g, so we can expect a “-E” underload error when the scale is turned on. After a few seconds, it will display a negative value, which annoyingly cannot be zeroed with the RE-ZERO key.

The solution: perform a zero point calibration after installing the density determination kit (no calibration weight is required).

Note: If you have not yet purchased an EJ series scale, consider purchasing one with a higher capacity to avoid this problem.

EJ-120 scale zero point calibration

Open the calibration switch cover on the bottom of the scale:

Remove the stainless steel weighing pan and install the density determination kit as described in the manual:

Switch on the scale and wait until a value is displayed (this can take a few seconds):

Press and hold the calibration switch until the scale displays “CAL 0” (then release):

Confirm the zero point with the [PRINT] key. The scale displays “100.00” (the required calibration weight for the next step, which we will skip):

Press the [ON/OFF] key to switch off the scale.

If you now turn the scale on again, it will display “0.00 g” with the density determination kit installed.

Note: Clever readers may have noticed that the total zero range of 24 g (±12 g) exceeds the 16.5 g weight difference. Therefore, it is possible to perform a zero calibration at a point where the EJ-120 scale automatically zeroes either with the density determination kit or with the stainless steel pan installed. However, this might not work reliably for long because factors such as temperature changes affect the zero point (which is the reason that the zero range exists).

Links to the EJ series on A&D’s websites: